Things We Would’ve Done Differently & Updates
#palmtoforehead

Check the Shopvac filter. I’m almost positive we don’t have the best shopvac out there on the market. And (I hate to admit) it took me almost a full day of vacuuming before I realized the issue & found a solution (aka – ask my husband what the the heck is wrong with “this stupid thing” and then beg him to go to the hardware store to get “the part” – thank you babe!). I’m still not sure if it was the quality of the filter, or the fact that the concrete dust was just “too much” for the filter to handle… but it tore and I spent hours trying to vacuum up dust, only for it to escape the filter and be blown back into the room and all over creation. Yep… this hamster was on the wheel a loooong time. Ugh. And this happened TWICE (I knew better the second time… at least I learn!!!). It was a dust, vacuum, dust, vacuum, vicious cycle from h***. Y’all the dust was so thick it was hard to see what I was doing!!! Hindsight is 20/20. So if the dust seems excessive (ha!) make sure the vacuum is operating properly. It will be dusty, but it shouldn’t be like a sandstorm in the Sahara. Also a good argument for wearing the proper PPE… most especially a good respirator… DO NOT SKIMP ON A RESPIRATOR!
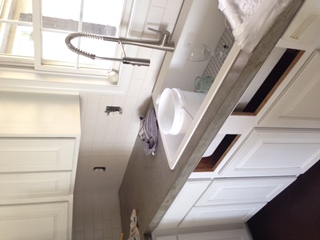
Empty out ALL of the kitchen cabinets & pantries. I emptied out the bottom cabinets simply because I didn’t want concrete dripping onto my pots and pans. Duh, right? But I didn’t give much thought to all of the dishes and groceries that were in the upper cabinets & pantry. Opps! The dust from sanding gets everwhere. Literally everywhere. Even though the cabinets stayed closed the entire time, I had to wash every dish in the cabinets, throw food away (cement dust got into the cereal boxes, etc.), wipe down the entire inside of every cabinet box, etc. before we could start putting the kitchen back together. I had the dishwater running for almost 2 full days, washing every single dish in the house. Talk about a major delay. :/ It will save you time if you literally empty out the entire kitchen.
Purchased pre-made, snap-off countertop forms. Have I said this enough? 😉 We found these [http://concretecountertopsolutions.com/categories/edge-profiles/] but thought we’d save some money and make the forms from melamine. After hours of constructing the heavy melamine forms, and then having leveling issues, we concluded this is one area that would have been well worth the $$$. When we do concrete counters next time we will definitely be purchasing the snap-off forms. If there is the even slightest error in your melamine forms, there will be areas where the thickness of the countertop varies and where the counter won’t be perfectly level. #yep #itsnotfun #trustme. Save yourself hours and hours of work and frustration and just purchase the pre-made forms. #justdoit
NOT used an acrylic fortifier to make a slurry. Usually my “hunch” is right. Usually. Well, the acrylic fortifier also seemed like a great idea! Everything I read about concrete countertops stressed the importance of making is “strong.” So the rather simple idea of adding fortifier to the slurry turned into a HUGE problem and an even bigger mess. After doing our homework we knew we’d have to slurry the top of the concrete counters because there would inevitably be pinholes that would need to be filled. Pinholes are bad, especially for kitchen counters because you (A) you don’t want bacteria harbored those little pockets, and (B) the sealer may not be able to cover/fill these teeny holes and you don’t want cooking oils, etc. penetrating and permanently discoloring the concrete. – So somewhere along the way I read that it’s a good idea to use an acrylic fortifier when making a slurry (instead of water) because it will be much, much stronger. Mind you, this advice wasn’t for the application of countertops… But it still sounded like a great idea… until it came time to do the final round of sanding/smoothing of the countertops just before the sealer is applied. The fortifier was strong… Too strong! Sandpaper (fine and course), sanding disks, and even a wire brush on a drill bit would only burnish (give it a smooth, shiny finish) the surface. I literally could not sand it down. —– Insert Meltdown Here —- We were so close to being done and now this!?!? CRAP!!!! The sealer instructions specifically say that it will not adhere to a burnished surface. “Fan-freakin-tastic!” We paid almost $200 for this sealer so there was no way I was going to risk it. I had no other choice but to purchase a grinder and grind through the fortified slurry layer, THEN resand, apply a new slurry (made without the blasted acrylic fortifier), sand, and then prep for sealing.
And I will be honest – Working with the grinder scared me to death. I turned it on and it felt like I was holding onto the Tasmanian devil himself, only louder and way more dangerous. On top of it threatening to jump out of my hands and go violently jolting around the kitchen, it was not the easiest piece of machinery to work with while trying to evenly grind down the surface. It takes skill to wield this tool, and it was a skill I did not possess. The grinding disk (spinning at however many zillions of RPMs) would skip/jolt if it hit a chunk of aggregate. This caused me to accidentally scar the top of the counters in a couple spots. Let me tell you… this was just the cherry on top… Creating one problem while trying to fix another. It was enough to, as mom says, “make a preacher cuss.”
But in the end it was all worth it!


I also took the opportunity to repaint the cabinets (this took about 1.5 weeks due to the several coats of paint) and we also painted the walls Benjamin Moore’s “Simply White,” and added a classic white subway tile backsplash.
UPDATE (7 months past project completion): We started this project at the end of September and finished about a month later in October… yeah… Our estimated timeline doubled due to a few hiccups in the process (Refer to the leveling, the acrylic slurry fiasco, etc. above).
But as I write this it is May (7 months later) and we are still in love with our concrete counters. We don’t regret doing this one bit, even with the few imperfections. It was a lot of work, but very much worth it and we’d do it again in a heartbeat!
I must also confess that we purchased Cheng’s wax and buffing pad… and never got around to waxing the counters! I know, I know… I was just so eager to reclaim my kitchen that I sort of just said, “I’ll get to that later.” Well, 7 months later and I still haven’t gotten around to it. But we haven’t had any issues with the counters! (knock on wood) So while I know that I will get around to it eventually, we’ve gotten by just fine without waxing it thus far.
It might be worth mentioning that we don’t set food down directly on our counters (we never have) unless it’s produce that is waiting to be cleaned and chopped up on the cutting board. Even when we rolled out pizza dough we use a board. So we really have very few spills and messes on our counters – not sure if that’s why we haven’t seen any negative impact from neglecting to wax them?
————————————————————————–
$AVING$: Concrete can be one of the cheapest options for countertops when done as a DIY project. But if you hire professionals to install them it is actually one of the most expensive countertop options available (sometimes even more than granite!!!). After doing this project I understand why it’s so expensive to have someone install it for you. The cost of the materials really isn’t bad (unless you make colossal mistakes like I made and end up acquiring several power tools… we needed a grinder anyway, right?). The high price tag is a result of the hours and hours of labor involved!
Ahhh… It was all worth it!
.jpg)
DIY Concrete Counters:
Part 3 of 6 – Preparing the Surface
Part 4 of 6 – Mixing & Pouring